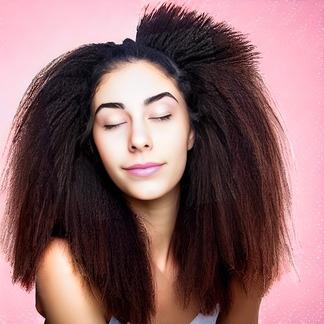
Do you often find yourself reaching for the blow dryer after a shower? While it’s a quick and convenient way to dry your hair, frequent blow drying can damage your hair over time. But don’t worry, there are natural and effective alternatives to dry your hair without using a blow dryer. We’ve got simple and efficient methods to help you dry your hair while maintaining its health and shine. Let’s delve into these techniques to help you embrace a healthier hair care routine.
Table of Contents
Towel Dry
Gently squeezing out excess water from hair after a shower is the starting point to a successful towel dry. Instead of traditional terrycloth towels, using a t-shirt to dry curly hair is much gentler and helps reduce frizz. Avoid scrubbing or rubbing the scalp, as it can cause irritation and breakage. Blotting with a soft towel is the best option; lightly press a towel to the scalp to absorb the water. Once finished, finish by gently squeezing the hair with the towel to remove any remaining moisture. Towel drying with these steps will leave you with healthy, beautiful hair.
Gently squeeze out excess water
After rinsing the shampoo and conditioner out of your hair, it’s time to move on to gently squeezing out excess water. You can use a towel to wrap and absorb the water, but don’t rub or scrub aggressively since this can damage the hair follicles. Gently squeeze the towel around the length of the hair and then begin to lift the hair in sections.
Working from the ends to the scalp, use your free hand to squeeze the water out of the strands. This will help to reduce the amount of time it takes to dry the hair. Once the hair is free of excess water, you can either leave it as it is or move onto the next step in your drying routine.
Use a t-shirt for curly hair
After squeezing out the excess water, it’s time to take an extra step and use a t-shirt for curly hair. This type of material is gentler on the strands and won’t rough up the cuticles, leading to smoother, shinier locks. To towel dry, simply fold the t-shirt in half and wrap it around your head. Squeeze the fabric all around your head, then gently pat and twist your hair to absorb more water.
You can even wrap it around a few times for more absorbency. The material of the t-shirt is also great for absorbing excess product and oils, so it’s a great way to add a bit more cleanliness to your routine. Plus, it’s soft and gentle, so it won’t tug at your curls or cause damage. Once you’ve towel-dried your hair with the t-shirt, you can go ahead and style it as usual. The t-shirt will help keep your curls hydrated and frizz-free.
Avoid scrubbing the scalp
Once excess water is gently squeezed out of the hair, the next step is to avoid scrubbing the scalp. It may be tempting to vigorously rub the head with a towel, but this can cause unnecessary damage. The towel should be used as a light blotting tool, pressing against the scalp and soaking up any additional moisture.
The same goes for the hair, as the towel should be gently pressed against the locks to absorb moisture without tugging or pulling. This is especially true for those with curly hair, as rough rubbing can cause frizz and a poofy appearance. Instead of rubbing, a t-shirt can be used to soak up excess water and lightly scrunch the hair for a more defined curl.
Once the scalp and hair have been blotted with a towel or t-shirt, the next step is to begin squeezing out the remaining moisture. Starting at the ends of the hair and working up the shaft, press between the fingers to carefully remove any leftover water.
Air Dry
Air drying is a healthy and convenient method of avoiding heat damage when styling hair. Using a diffuser is an effective way of speeding up the process. To avoid tangles, it is advised to tie hair up in a loose bun or braid. A leave-in conditioner helps to keep hair hydrated while drying and is especially beneficial for curls. Air drying with a diffuser can help to maintain hair’s natural shape and texture. It is also helpful to use a microfibre towel to help reduce frizz. The towel should be gently wrapped around the hair and the ends should be tucked for a smoother finish.
Use a diffuser to speed up the process
Once you’ve toweled off as much water as possible, you may want to consider using a diffuser to speed up the air drying process. Diffusers are a great way to gently dry your hair without creating too much heat, which can damage delicate strands. To use the diffuser, attach it to the end of your blow dryer and place it underneath your hair, scrunching the hair with your fingers as you move the diffuser around.
This will help add body and texture to your hair as it dries. Make sure to use a low heat setting to avoid damaging your hair. For best results, apply a leave-in conditioner prior to diffusing to protect your hair and enhance the overall look. With a diffuser, you’ll be able to quickly and easily air dry your hair without the worry of heat damage.
Tie hair up to avoid tangles
Having achieved the perfect towel dry, you may now want to consider tying your hair up to avoid tangles and maintain your style. To do this, start by gathering all of your hair together at the nape of the neck, and then divide it into two sections. Once done, tie the sections together with a soft elastic band, making sure that all of the hair is securely held in place. You could also use a scrunchie or a clip for a more secure hold. Once you have tied your hair up, you will be able to move on to the next step of air drying.
Use a leave-in conditioner
Once you have towel-dried your hair, it’s time to move on to the next step: using a leave-in conditioner. A leave-in conditioner is a product specifically designed to be left in the hair, as opposed to being washed off after use. It acts as a barrier between your hair and the elements, helping to keep your locks from becoming too dry or damaged.
Leave-in conditioner helps to add moisture and shine to the hair, while helping to prevent frizz and flyaways. It also helps to keep your hair looking healthy and vibrant. Depending on the product you use, it may also help to add volume and body to the hair.
When using a leave-in conditioner, it’s important to apply it evenly from the roots to the tips of your hair. Start by sectioning off your hair, then gently massage the product into each section. Make sure to use a generous amount so that all strands are well-coated.
Use a Cotton T-Shirt
Cotton T-shirts are the perfect way for drying and styling wet hair. Wrap the wet hair in the cotton T-shirt and squeeze and pat dry. This technique helps to remove excess water, reducing the risk of frizz while drying. The cotton fibers of the T-shirt are gentle on the scalp, preventing split ends. Additionally, the cotton material absorbs more water than a regular towel. Leave the wet hair wrapped in the T-shirt for several minutes before taking it off. This will help to reduce the amount of frizz and bring out the natural waves and curls in the hair.
Wrap wet hair in a t-shirt
To wrap wet hair in a t-shirt for a drying session, begin by selecting a clean cotton shirt. Then, flip the shirt over so the middle of the back section is visible. Position the wet hair so that it is spread out in the middle of the back section, making sure the bottom of the hair is touching the shirt. Take the arms of the shirt and wrap them around the hair, gathering the material until it covers the entire length of the hair. Secure the gathered material with a rubber band. Now the hair is completely wrapped in the t-shirt for a gentle drying session.
Squeeze and pat dry
Once your hair is wrapped in the t-shirt, it’s time to start squeezing and patting the strands. Begin at the ends and work your way up, making sure to be gentle and never tug. Squeeze the fabric firmly to remove excess water, but avoid wringing the t-shirt, as this may cause your hair to break. Make sure to pat the strands instead of rubbing them, as this can create frizz. This way you can reduce the amount of heat and friction applied to the hair, preventing any damage.
Once you reach the top of your head, start rolling the t-shirt down, squeezing and patting as you go. This will help to remove any excess water from the scalp. When you reach the ends, you may need to squeeze and pat one last time to ensure that all of the water has been absorbed. Once you’re done, you can remove the t-shirt and check your hair. It should be damp but not soaking wet.
Remove excess water
After wrapping wet hair in a cotton t-shirt, the next step to take is to remove the excess water. To do this, start at the ends of the hair and gently squeeze and pat down each section. This motion removes the majority of the water from the hair, and it should take around five minutes to complete. Once done, take a few paper towels and blot them on the ends of the hair to soak up any remaining water.
After this step finishes, the hair should be damp and ready to be styled. To avoid frizz and split ends, it is important to make sure to use a gentle touch when removing the excess water. To avoid damaging the strands, try to refrain from rubbing the hair while squeezing and patting down the sections. After the excess water is gone, the hair should be ready to style without worry of frizz or split ends.
Natural Oils
Natural Oils are a great way to nourish and restore your hair. Selecting the right oil for your hair type is essential to maximize its benefits. For dry, brittle hair, avocado oil is a great choice, providing hydration and improving elasticity. Massage the oil into your scalp and hair with gentle, circular motions.
Leave it on overnight for best results. Essential oils can be used to nourish your hair and scalp, adding a pleasant aroma while providing nourishment. Lavender and rosemary are popular choices. Whatever oil you choose, listen to your hair’s needs and adjust accordingly.
Choose the right oil for your hair type
Having changed out of your cotton t-shirt, the next step is to choose the right oil for your hair type. Depending on what kind of hair you have, there are a number of oils that can be beneficial. For those with dry or brittle hair, a heavier oil such as avocado oil can be a great option. This nutrient-dense oil has high levels of fatty acids, vitamins, and minerals that help improve the condition of your hair. Coconut oil is another great choice, as it helps to lock in moisture and prevent breakage. For those with oily hair, lighter oils such as jojoba oil and argan oil are ideal, as they help to balance oil production.
Just like you would massage your body, it’s important to massage your scalp and hair with the oil of your choice. This helps to stimulate hair follicles and promote circulation. Your scalp is the foundation for your hair, so it’s important to give it the attention it needs.
Massage the oil into your hair
Having covered the basics of choosing the right oil for your hair type, it’s time to move on to the application process. Massaging the oil into your hair is a crucial step in the process.
Start by sectioning off your hair into 4-6 parts. Take a generous amount of oil and warm it up in your hands to make it easier to apply. Starting at the scalp, use your fingertips to massage the oil into your scalp using circular motions. The massage will help stimulate the scalp and promote better blood circulation, encouraging healthy hair growth. Make sure to reach the ends of the hair and the nape of your neck.
Once the entire scalp and hair is covered in oil, start working the oil into your scalp and hair in a combing motion. This will help distribute the oil evenly. Make sure you take your time and keep massaging the oil into your scalp and hair until the oil is completely absorbed.
Leave it on overnight for best results
Now that you have chosen the right oil for your hair type, it is time to massage the oil into your hair. After doing so, the next step is to leave the oil in your hair overnight for best results. Allowing the oil to sit on your hair overnight gives the oil more time to penetrate your scalp and provide a deeper level of hydration.
If you are looking for a deeper level of hydration from your oil treatment, this is the best way to go about it. When you wake up in the morning, your hair will be noticeably softer and healthier-looking. Additionally, your scalp will be more moisturized and nourished, resulting in healthier and stronger hair.
Essential oils are also an option for overnight oil treatments. These oils are filled with vitamins, minerals, and antioxidants that can nourish your scalp and hair. Avocado oil is also a great option to use in your overnight oil treatments.
Microfiber Towel
Microfiber towels are a great alternative to traditional cotton towels when it comes to drying your hair. After a shower, wrap wet hair in a soft microfiber towel – not only will it absorb moisture more quickly, but it will also cause less damage to the hair cuticle. Gently squeeze and pat dry to remove excess water, then use a hair dryer to finish the job. Microfiber towels are superior to cotton towels due to their quick-drying attributes and ability to absorb more water than the latter. Keep your microfiber towels in great condition by washing them regularly.
Wrap wet hair in a microfiber towel
After exploring the benefits of natural oils, let’s move onto an essential hair care tool – the microfiber towel. Wrapping wet hair in a microfiber towel is a great way to quickly remove excess water, reduce damage, and keep hair healthy.
The first step is to squeeze and pat dry the hair with the towel. Start from the top and work down to the ends. Make sure to apply pressure only at the scalp and gently pat the mid-lengths and ends. This will help reduce the amount of friction and minimize breakage.
Once most of the water is absorbed, gently wrap the hair with the microfiber towel. This will help absorb the remaining water and prevent damage. It’s important to avoid rubbing the hair with the towel, as this can create frizz and cause split ends.
Compared to cotton towels, microfiber towels are much softer and absorb more water. This makes them a great option for people with fine or curly hair.
Squeeze and pat dry
Transitioning from natural oils to the next step in hair care, drying with a microfiber towel, is an important part of the process. To properly squeeze and pat dry with a microfiber towel, it is important to begin by wrapping the towel around wet hair. After the towel is securely wrapped, the excess water is then removed by gently squeezing and patting the hair. This process should be done slowly and patiently to ensure that the hair is not damaged.
Gently releasing the towel and then squeezing and patting again, will help the towel soak up any additional water. Taking this time to properly dry the hair will help to maintain the health and hydration of the hair strands. Compared to cotton towels, microfiber towels are much more absorbent and leave the hair less frizzy. After the hair is completely dry, it is important to clean the microfiber towel for future use. Washing the towel with a mild detergent and air drying it, is the best way to clean the towel without damaging it.
Remove excess water
Moving on from the nourishing oils, it is time to remove excess water from the hair. The most effective way to do this is by using a microfiber towel. The towel should be wrapped around the hair and then gently squeezed and pat dried. This helps to avoid creating too much friction which can damage the hair.
The microfiber towel is much more effective than cotton towels as it absorbs more water. It also helps to reduce frizz and stays soft on the hair unlike cotton towels which can be very rough. Additionally, the microfiber towel is very lightweight and can be easily carried around in a bag.
To effectively remove excess water, start with wrapping the towel around the hair. Make sure the towel is not too tight but just enough to absorb the water. Then, use the towel to squeeze the water out of the hair. This should be done carefully and gently. Finally, pat dry the hair with the same towel. This will help to absorb the remaining water from the hair.
DIY Hair Mask
Making a DIY hair mask is a great way to give your hair some extra love. First, you need to choose the right ingredients for your hair type. Dry hair might require avocado, banana, and coconut oil while damaged hair may need honey, egg white, and olive oil. Once you have the ingredients, mix them together in a bowl and apply the mask to your hair. Leave the mask on for 15-20 minutes and then rinse it out with lukewarm water. After completing this treatment, your hair should feel softer and more hydrated. With the right combination of ingredients, you can create the perfect DIY hair mask for your specific hair type.
Choose the right ingredients for your hair type
Now that you have your microfiber towel ready, it’s time to make a DIY hair mask. Before you begin, it’s important to choose the right ingredients for your hair type.
When selecting the components of your hair mask, look for natural ingredients that can help nourish and hydrate your hair. For dry hair, use ingredients like avocado, olive oil, and honey. These ingredients are perfect for providing moisture and nourishment to dry strands. For damaged hair, opt for ingredients such as banana, coconut oil, and yogurt. These components can help repair split ends and fortify weakened strands.
If you have oily hair, use ingredients like egg whites, apple cider vinegar, and lemon juice to help remove excess oil and refresh your scalp. When using essential oils, go easy on them and consider using no more than a few drops per mask. The right essential oils can add an additional layer of nourishment and hydration, but too much can weigh down your hair.
Apply the mask to your hair
Now that you’ve chosen the right ingredients for your hair type, it’s time to apply the mask to your hair. Begin by combing your hair with a wide-tooth comb to remove any tangles. Then, apply the mask evenly throughout your hair, focusing on the ends and any dry or damaged areas. Take your time to make sure all the strands are evenly coated. Once the mask is applied, wrap your hair in a warm, damp microfiber towel.
This will help the natural oils and active ingredients get soaked into your hair. After 15-20 minutes, rinse the mask out and follow up with a conditioner. Finally, use a wide-tooth comb to detangle your hair and style it as desired. With this simple DIY mask, you can give your hair the nourishment it needs to be healthy and shiny.
Let the mask sit for 15-20 minutes
Now that you’ve chosen the right ingredients for your hair type and applied the mask to your hair, it’s time to let the mask sit for 15-20 minutes. As you wait, you can relax and enjoy a moment of self-care.
Let your head be enveloped in the warmth of a cozy towel or wrap your hair in a microfiber turban to help retain the heat. Take this time to relax and pamper yourself. Enjoy a cup of tea or a light snack to help pass the time. You can even keep your hands busy by working on a craft or reading a book.
As you wait, you can feel the nourishing and restorative powers of the mask at work. After 15-20 minutes, rinse the mask off with lukewarm water. You can use your microfiber towel to gently squeeze the excess water from your hair. Now you’ll be rewarded with softer, healthier, and shinier locks!
Natural Mists
Natural mists are an excellent alternative to traditional hair styling products as they provide nourishment and hydration for your hair while adding a natural-looking shine. Choosing the right mist for your hair type is essential as different mists contain different ingredients. For instance, a mist designed for curly hair might contain more nourishing oils than one designed for straight hair. Spray the mist onto your hair before styling to achieve the desired look. Let the mist air dry, or use a diffuser for extra volume.
For those looking for a more natural approach, there are natural mists available that are made from organic ingredients.
Choose the right mist for your hair type
Moving on from DIY hair masks, one of the best ways to naturally hydrate and nourish your hair is with mists. Knowing the right type of mist for your hair type is the key to unlocking the full potential of your hair.
When it comes to choosing the right mist, you need to first consider the type of your hair. For example, if your hair is dry, then you need to choose a mist that is rich in natural oils and vitamins to help restore the hair’s natural moisture and shine. If your hair is oily, then opting for a mist that contains natural astringents to help reduce the oils in your hair is a good idea.
In addition to considering the type of your hair, you also need to consider the texture of your hair when choosing the right mist. If your hair is curly or wavy, you’ll need to choose a mists that is specifically designed for these types of hair.
Spray the mist onto your hair
After creating your own natural mist, it’s time to apply it to your hair. It’s important to carefully spray the mist onto your hair in order to get the most out of it. To start, use your fingers to create a part and part your hair into sections. Then, take the mist and spray it onto the part. Make sure to evenly distribute the mist, and be sure to get the roots and ends of your hair.
Once the part is covered, move onto the next section and repeat the same steps. Keep in mind that you don’t need to saturate your hair, so be careful not to over spray. It’s best to apply the mist at least five inches away from your head. Once you’re done spraying the entire head, you can massage your scalp using your fingertips to ensure that the mist is evenly distributed. Finally, let the mist air dry before styling your hair as usual.
Let the mist air dry
Now that you’ve chosen the perfect mist for your hair type, it’s time to apply it. Before you spray the mist onto your hair, make sure to hold the bottle about six to eight inches away from your head. This will ensure that the mist is evenly distributed. After the mist has been applied, let it air-dry.
Letting the mist air-dry can be an incredibly rewarding experience. The cool air will help to soothe and relax your scalp, while the mist will simultaneously help to nourish and replenish your hair. As the mist is drying, it will coat your hair in a light, protective layer that will help to keep your hair hydrated and healthy. The mist will also help to protect your hair from the sun, wind, and harsh environmental factors.
After the mist has completely dried, you’ll notice that your hair looks and feels softer, more manageable, and healthier. The mist will also give your hair a glossy and vibrant sheen that will make it look more beautiful.
Heat-Free Curling
When it comes to heat-free curling, choosing the right materials for your hair type is essential. Wrapping your hair around materials such as perm rods, flexi rods, or straws can help you achieve a variety of looks, ranging from tight curls to voluminous waves. Secure the ends of your hair with bobby pins to ensure the curls last longer. For a twist-out look, section your hair into two-strand twists and secure the ends with a clip or bobby pin. For an even more defined look, use curlformers. Begin by sectioning your hair and wrapping each curlformers around each section.
Choose the right materials for your hair type
Although natural mists can help enhance your curls, the materials you use can make or break the look. Depending on your hair type, you may need to choose materials that work best for your hair. If you have thick, curly hair, use materials that can stand up to the weight. Consider using foam rollers or thicker materials like sponges or socks, which can help create larger curls.
If you have thin hair, you can use smaller materials like straws or even paper towels. These materials will help create lighter curls that won’t weigh your hair down. Once you have chosen the right materials, wrap your hair around the materials, ensuring that the ends are secure with bobby pins. For a twist-out, begin at the root and twist your hair around the materials tightly. Secure the ends with a bobby pin and let it set overnight. For a curlformer, you may need to use a product to help your hair set.
Wrap hair around materials
Making the transition from natural mists to heat-free curling may seem like a daunting task, but it is actually quite simple. The key to achieving successful heat-free curls is to start with the right materials for your hair type. When it comes to wrapping hair around materials, there are a variety of products to choose from. For those with fine and thin hair, a foam sponge roller is the perfect curl enhancer. The foam material helps to make the hair more pliable and allows for easy wrapping and secure hold. For those with thick and coarse hair, a perm rod is a great option as it provides extra hold and won’t cause too much damage to the hair.
Once you’ve chosen the right materials for your hair type, it’s time to wrap your hair around them. Start at the nape of your neck and begin to wrap your hair around the material of your choice. Make sure to be gentle when wrapping your hair, so as not to cause any damage.
Secure the ends with bobby pins
After experimenting with natural mists to hydrate and tame wild locks, it’s time to move on to the next step: heat-free curling. Securing the ends of your hair with bobby pins is an important part of getting the desired results. When selecting bobby pins, choose ones that are strong enough to hold your hair in place without damaging the delicate strands. To prevent breakage, look for pins that are coated with a silicone finish, as this helps to reduce friction.
When wrapping hair around materials for a heat-free curl, make sure to use a gentle touch and take care not to pull too hard. Pulling too hard can cause the pins to come loose, leaving your curls lopsided and uneven. To secure the ends of your hair, start by taking a small section of hair and wrapping it around the material. Once the curl has been formed, twist the ends of the strand and secure them in place with a bobby pin. This will help keep the curl in place and create a more polished look.
Conclusion
Drying your hair without a blow dryer is a great way to preserve its health and shine. With a few simple techniques, you can achieve beautiful results. Towel drying and air drying are the most natural ways to dry your hair without exposing it to damaging heat. You can also use a cotton T-shirt to dry your hair without any heat, and you can use natural oils to keep your hair looking healthy and shiny. Additionally, using a microfiber towel, making your own DIY hair mask, and spritzing your hair with natural mists can help keep your hair looking great. Finally, you can try heat-free curling to get beachy waves without the heat. By following these steps, you can keep your hair looking great without using a blow dryer.